When Isabella called me up to tell me she’d gotten her hands on an old bath we both squealed with excitement, minds going into overdrive imagining the little oasis we could create in her backyard.
She’s living in a rental whilst building her dream home, so the set up needed to be temporary (no drilling, plumbing or painting walls here!) – but that just makes it even more perfect to share with you all because anyone (even renters!) with a little bit of outdoor space, access to a bath, some help from a handy man and willingness to put some love into their home could do this DIY.
Isabella’s bath was actually being used on a farm as a pig trough (seriously!!) so it had to be cleaned thoroughly and resurfaced and painted. One of her friends was amazing and helped out with that side of things, as well as adding those amazing claw feet that he found at a local old wares store.
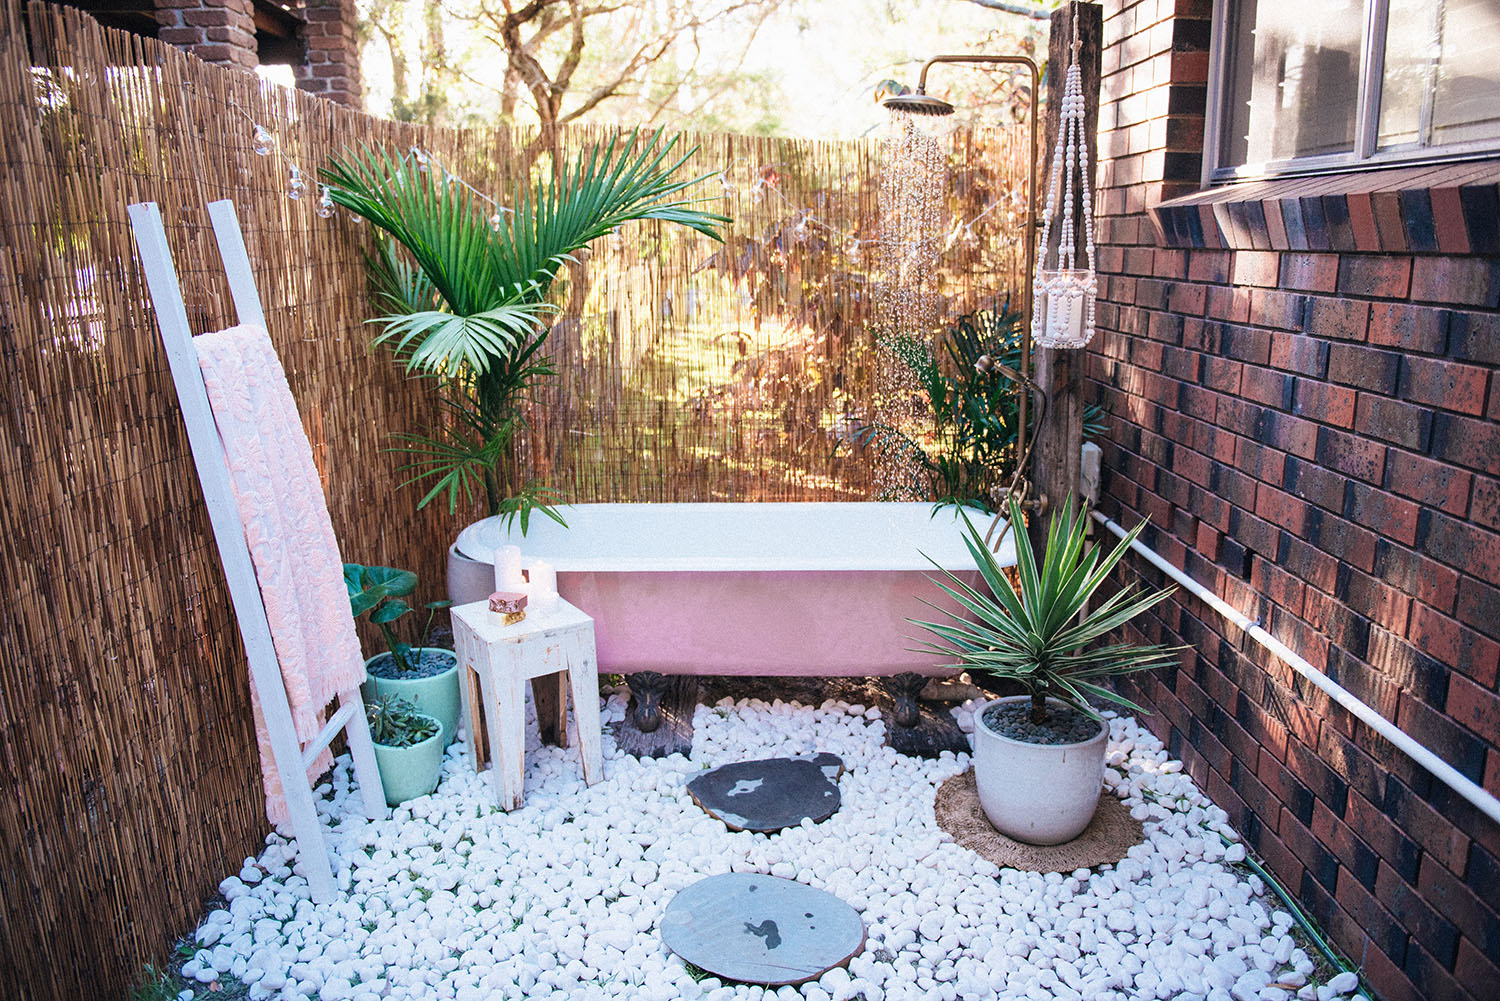
We knew we wanted amazing brass or antique looking fixtures so searched online and found this one at a very reasonable price. As we couldn’t attach the shower head directly to the wall we sourced an old railway sleeper and some offcuts of rustic hardwood for the bath to sit on. This is really important as once the bath has water in it it becomes very heavy, so if you were to put it directly on the grass it would sink and become unlevelled (plus the beautiful claw feet would rust!). You can often find hardwood at a landscaping centre. A local handyman laid down the wood for the bath to sit on and put the sleeper into place. Once we had received the fixtures and the bath we called up a plumber and figured out the best way to get hot water outside. He simply attached a long hose from the laundry sink out the window and to the bath. This means to turn it on you simply turn on the taps in the laundry. He also laid down a drain that lets out the water near a tree approx 2 metres away. As the drainage runs into the garden it’s just another reason to make sure there are no nasty chemicals in any soaps or products that are used in the bath!
So with the bath in place, plumbing hooked up, and drainage sorted we could start creating the space.
DIY STEPS:
1 – Get your green-thumb on
The first step was to bring in some plants that we potted in white and mint ceramic pots. Not only do they look beautiful but they also add an extra layer of privacy and bring a lush vibe to an otherwise urban space.
2 – Add some privacy
It’s pretty likely that you’ll need to put up some kind of screen for some privacy in your new bathroom. We used Bamboo screen bought at the hardware store – it’s inexpensive, easy to install and does the job. Luckily there as a a metal fence in the area we set up the bath so we simply used zip ties to attach the bamboo screen.
3 – Lay down tiles and gravel
Put your pot plants in place around the bath and lay down stepping stones to create a pathway. Once you have these pieces in place and you’re happy with the layout spread out white pebbles over the grass covering it completely. You’ll probably need more pebbles than you think (we bought 15 x 5kg bags, but could have done wth 30 to give better coverage!).
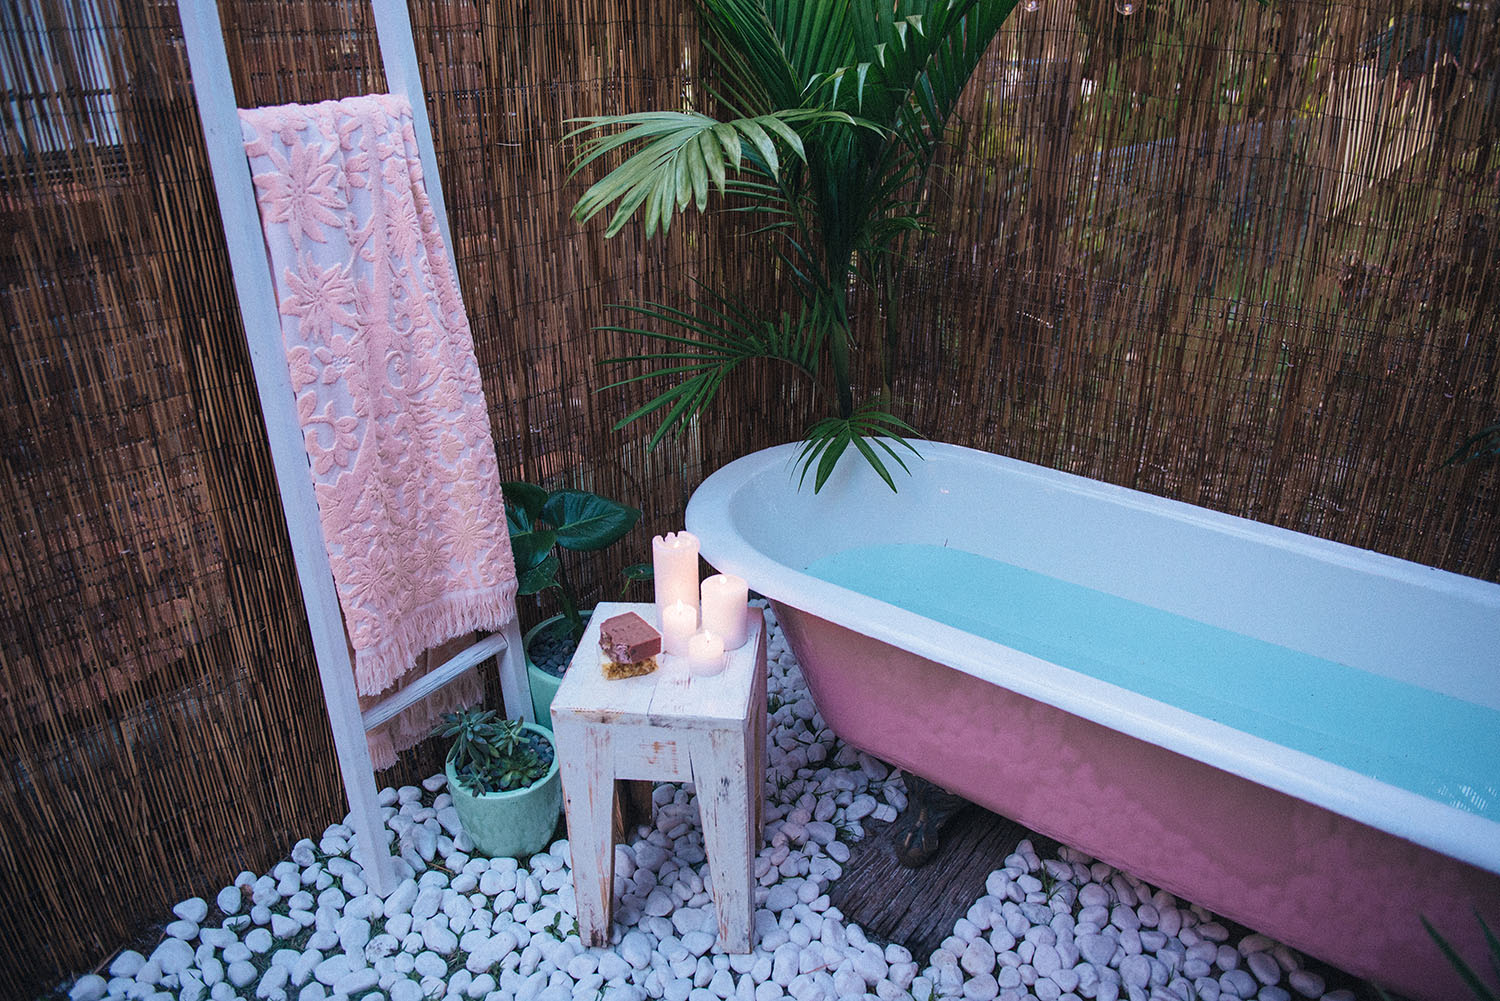
4 – Pretty little details
We added a rustic white ladder to use to hang up towels, and a wooden stool as a side table whilst in the bath (perfect for candles, soaps, your book and vino). We also hung a shell plant hanger but switched out the plant and replaced it with a candle for some extra ambiance. Finally we strung LED festoon lights through the bamboo screening to give off some light for baths under the stars.
Fill the tub and enjoy!
xx
We hope you love this DIY as much as we loved putting it together! If it inspires you to create your own space share your pics with us – we’d love to see them! #spellDIY